Vane CVP Application
This application can be installed on your cvp instance in order to conduct network testing. You can run NRFU tests as well as any other kind of tests that have been automated within your test plan.
I. Running NRFU Tests on your CVP instance
To execute the predefined NRFU tests that are available as a part of this application on your cvp instance refer to this section
II. Running non NRFU Tests on your CVP instance
To execute non-NRFU tests, including customized test cases, and network certification test cases, abide by the following instructions:
Step 1 - Install Vane on the CVP host
Follow the instructions, specifically the steps from Step 1 to Step 8 laid out in this section of NRFU Testing. Those steps should guide you towards downloading and installing the application on your cvp instance.
By the end of Step 8, you should be able to see the following prompt:

Step 2 - Run Vane
Now you are good to execute non Nrfu tests using Vane. There are 2 paths you could follow at this point:
A. Run Vane the default way
B. Run Vane using the CVP option (recommended for new users)
Before we dive into either of these, let us briefly cover how you can import your customized test cases into this working environment. This is essential as by default the application comes pre-installed only with nrfu tests and sample network tests which test basic aspects of your network. These pre-defined tests can be found within the vane-data directory.
Importing local customized test directories
If you are not planning on using custom test cases, you may skip this section and move to either A. Run Vane the default way or B. Run Vane using the CVP option.
Explaining the mountpoint between CVP host system and Vane-CVP container
The Vane-CVP extension has a mountpoint that links a directory from the host OS to within the container OS so we can easily add/retrieve files and data from the container for use with Vane. This mountpoint is located at /cvpi/apps/vane-cvp/vane-data on the CVP host system, and is mounted as the directory /vane-data within the Vane-CVP container.
Once the Vane-CVP extension has been installed, this mountpoint is automatically established, and any activity within the two endpoints will be visible on both sides of the mount. If the Vane-CVP extension is uninstalled or stopped and restarted, the mountpoint is reestablished, and the existing files in the CVP host system's /cvpi/apps/vane-cvp/vane-data directory are remounted. No data will be lost by stopping or uninstalling the Vane-CVP extension.
When you first connect to the Vane-CVP container after a fresh install, you are placed in the /vane-data directory. If you do a directory listing, you will see a pytest.ini file, and two directories containing nrfu test cases and sample network test cases.

If you log into the CVP host in a second shell window, and change to the /cvpi/apps/vane-cvp/vane-data directory and do a directory listing, you will see the same file and directories there.

Now we can upload our own test case files to the CVP host and put them under this directory for Vane to use within the container. In the CVP host system shell, create a new directory to store your custom test cases.
[root@jamazan vane-data]# mkdir my-new-vane-tests

[root@jamazan vane-data]# ls -la
total 24
drwxrwxrwx  5 cvp  cvp  4096 Apr  5 15:47 .
drwxr-xr-x  4 cvp  cvp  4096 Apr  5 15:28 ..
drwxr-xr-x  2 root root 4096 Apr  5 15:47 my-new-vane-tests
drwxr-xr-x  2 cvp  cvp  4096 Apr  5 15:45 nrfu_tests
-rw-r--r--  1 cvp  cvp  2171 Apr  5 15:45 pytest.ini
drwxr-xr-x 22 cvp  cvp  4096 Apr  5 15:45 sample_network_tests
And if you check the directory listing from within the container now, you will see the same directory now appears in the container's listing.
(vane-cvp-shell) jamazan vane-data # ls -la
total 24
drwxrwxrwx    5 cvp      cvp           4096 Apr  5 15:47 .
drwxr-xr-x    1 root     root          4096 Apr  5 15:31 ..
drwxr-xr-x    2 root     root          4096 Apr  5 15:47 my-new-vane-tests
drwxr-xr-x    2 cvp      cvp           4096 Apr  5 15:45 nrfu_tests
-rw-r--r--    1 cvp      cvp           2171 Apr  5 15:45 pytest.ini
drwxr-xr-x   22 cvp      cvp           4096 Apr  5 15:45 sample_network_tests
Now that you understand the above it is easy to add your custom test cases to the Vane container. Simply upload your test cases to the CVP host, placing them in the subdirectory of /cvpi/apps/vane-cvp/vane-data that you just created. You can do the upload directly to this location or upload to a temporary location and then move the files to this directory afterwards.
Steps
- Copy the tests from local directory to the mountpoint location we created within our cvp host
- Log into the CVP host and change to the mountpoint (/cvpi/apps/vane-cvp/vane-data/my-new-vane-tests/) location (not shown)
- Unpack the test cases
Finally, you need to change the ownership of the test cases to the cvp user, since that is the default user inside CVP containers. Without changing the ownership, Vane will not be able to write some logging and reporting data to the directory when it is running the test cases.
Warning
The cvp user ownership must be maintained at all times within the directory structure of the mountpoint. If new files or directories are added at any time, these must also be changed to the ownership of the cvp user.
After transferring and unpackaging your tests, the directory inside the Vane-CVP container will countain all your test cases.
(vane-cvp-shell) jamazan vane-data # ls -la my-new-vane-tests/my-vane-tests/
total 316
drwxr-xr-x    2 cvp      root          4096 Apr  5 16:46 .
drwxr-xr-x    3 cvp      root          4096 Apr  5 16:46 ..
-rw-r--r--    1 cvp      root          2257 Apr  5 16:46 conftest.py
-rw-r--r--    1 cvp      root             0 Apr  5 16:46 definitions_nrfu.yaml
-rw-r--r--    1 cvp      root             0 Apr  5 16:46 duts_nrfu.yaml
-rw-r--r--    1 cvp      root          1593 Apr  5 16:46 master_def.yaml
-rw-r--r--    1 cvp      root          4865 Apr  5 16:46 test_bad_syslog_events.py
< ...directory listing truncated... >
Important
Ensure that your test case folder has a conftest.py file for initializing the basic pytest configs for a valid test run. You can copy the conftest.py file from the nrfu_tests directory located in the vane-data directory into your test case directory. This sample conftest.py file is also available from the Vane GitHub repository here.
Tip
If desired, the custom test cases can be edited directly on the CVP host by editing the files in the /cvpi/apps/vane-cvp/vane-data path. Any edits made from the CVP host system will reflect immediately in the Vane-CVP container and will be applied the next time the Vane tests are run.
Now that you have imported your local customized test cases, you can follow either of the approaches listed below!
A. Run Vane the default way
This is basically the conventional way of running Vane where you set up your definitions.yaml file and duts.yaml file with the necessary information. Executing Vane section covers these steps in detail. Keep in mind to modify the test_dirs field within your definitions.yaml file to mention the path to your imported customized test case folder.
We recommend using Option B if this is your first time running Vane, since it will initialize the defaults and use your CVP instance to gather duts data for running vane.
B. Run Vane using the CVP option (recommended for new users)
Here you will be making use of the vane -- cvp option provided within the vane cli. This allows Vane to use CVP for determining test setup options.
Executing the above command will lead to a prompt asking you to enter your credentials for the cvp monitored devices.
After successfully authorizing, it will display the following
After which it will ask you if you want to provide custom test cases (it will default to in built nrfu test cases if you say No)
If you say Yes to the above prompt, it will further ask you for the path to the imported test cases.
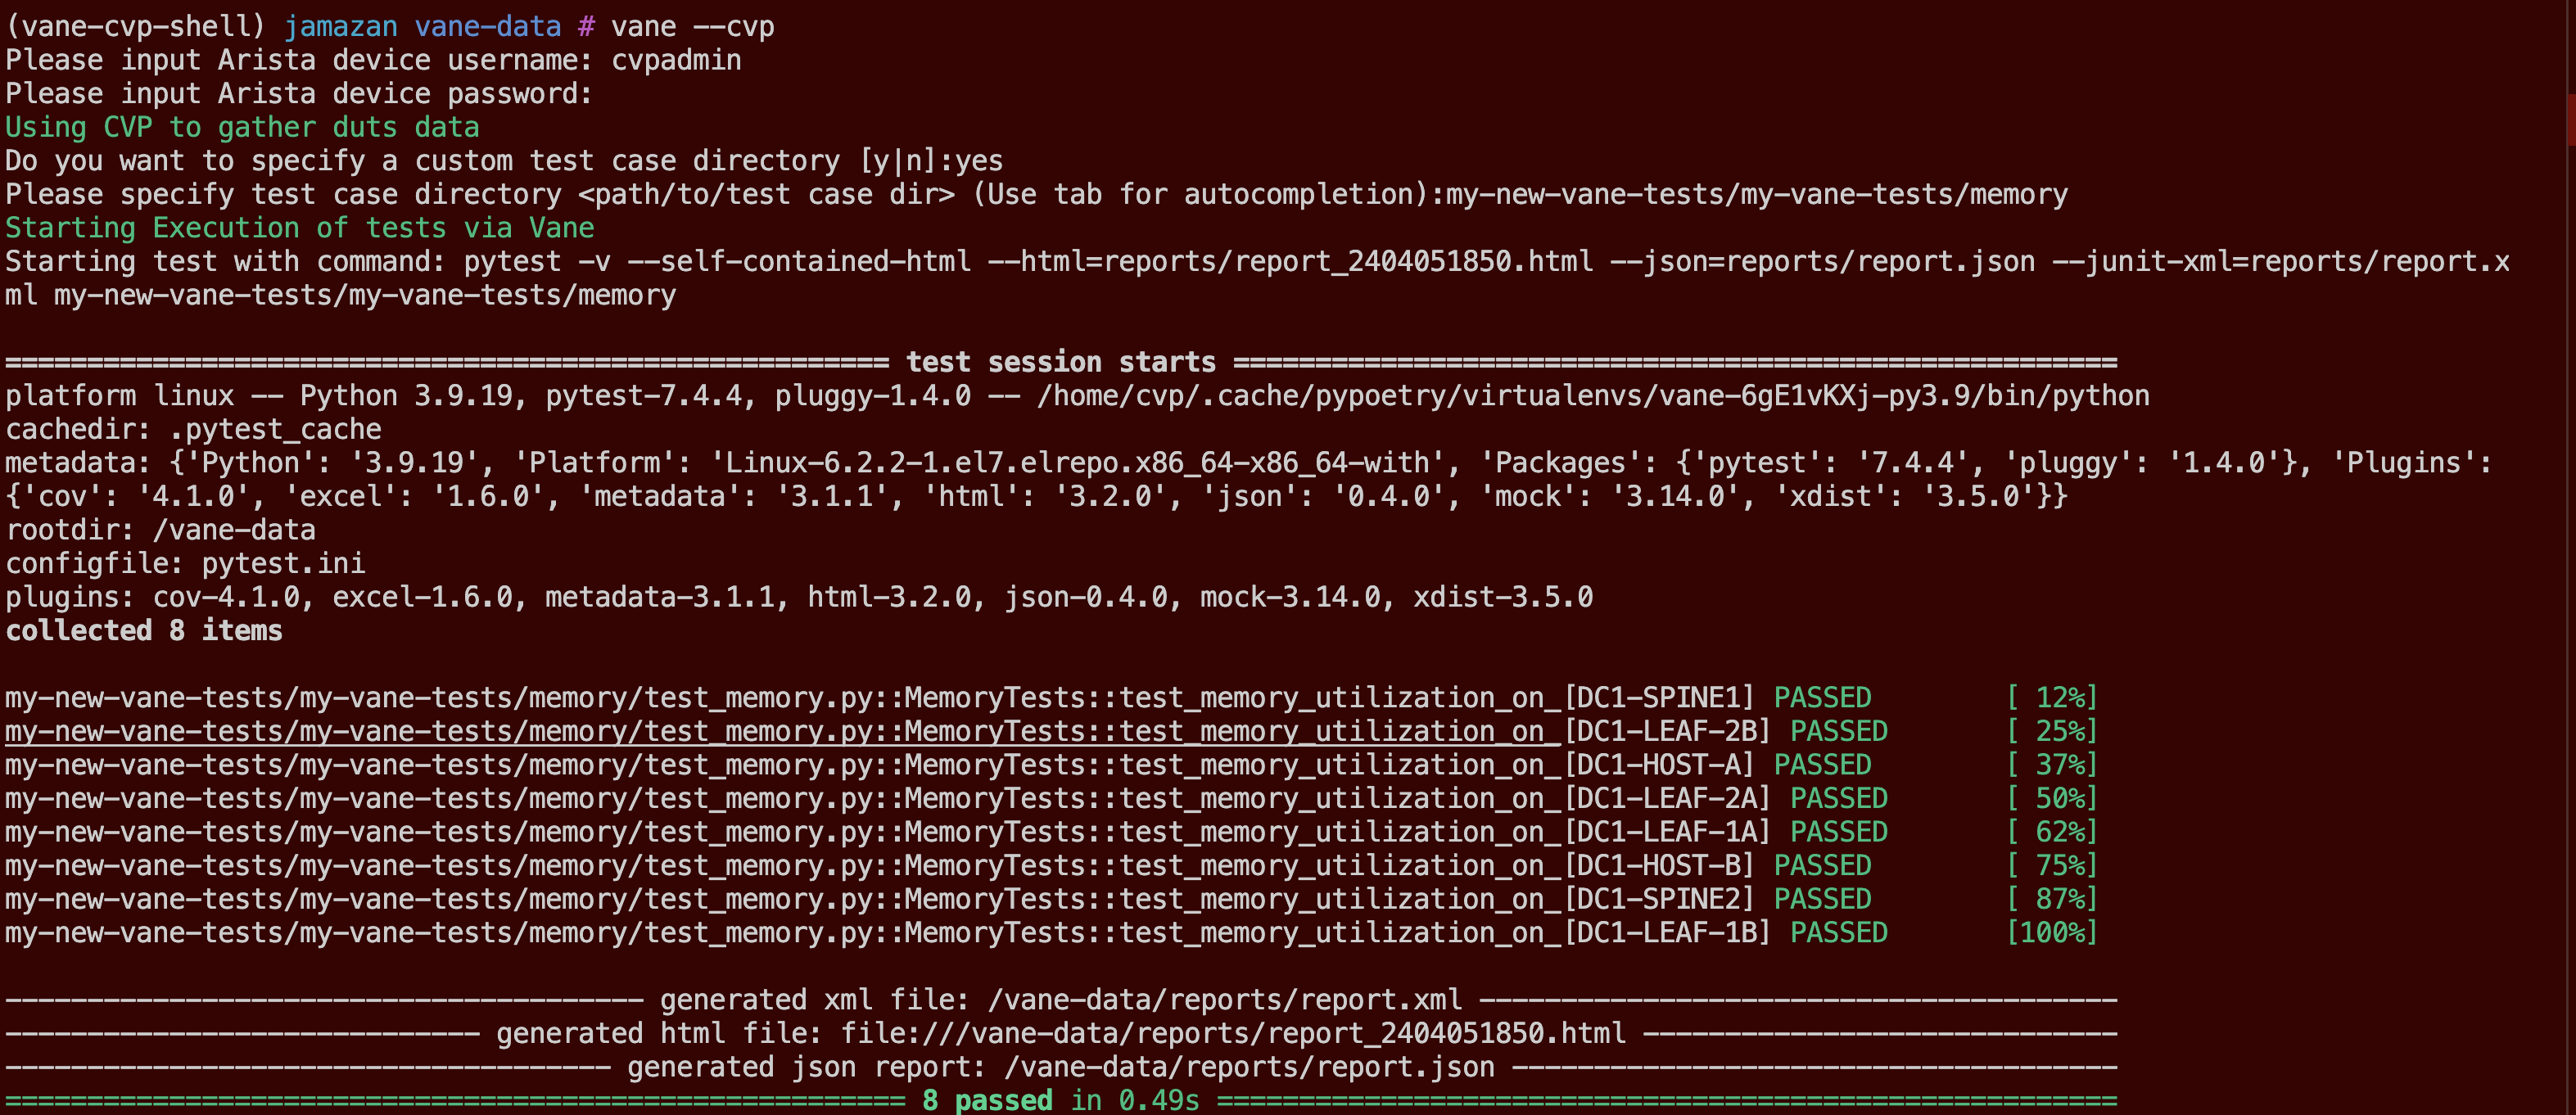
Success
Once you provide a valid path, you are all set and Vane will execute your customized test cases on your devices and generate corresponding reports.